You create the specific terms of your courses after you create the course and group(s).
Creating sessions for open and rolling courses – for the period
To add terms, select the group you want to populate with events via the Courses/Groups tab.
- scroll down to the Lessons/Events tab and then on the button Add lessons/events
- click on the Create lessons/events button

If you have created events before and saved the template, you can use it next time you create events or enter them manually.
Manually creating a group of terms
Repeat lessons/events
You can choose between two ways to repeat lessons:
1. Repeat until: In
this case, select a date and the system will automatically add the
dates based on the selected repetition frequency (daily, weekly, etc.)
2. Number of repeats: Enter
the number of lessons/events you want to create and the system will
automatically create lessons/events at the selected frequency and
therefore determine the date of the last appointment automatically.
Repetition frequency
Depending on your needs, choose whether you want to repeat events daily, weekly, bi-weekly or monthly.
Blocks
Overview of events

On the timeline you can see weekends as well as holidays. You have an option to tick checkboxes – Skip holidays and skip school breaks and system will automatically skip them.
You can also delete manually inappropriate events from the list of events, by clicking on the Bin icon.
 Note: Once you change the event settings in the left
bar again, the events will be re-created so the term you deleted can
reappear in the list.
Note: Once you change the event settings in the left
bar again, the events will be re-created so the term you deleted can
reappear in the list.Delete a group of terms
In the left bar there is a button with a Bin icon. Click on this icon to delete all events created in this group.
Saving a group of terms
When you have finished entering the terms, continue by pressing the OK button. The left bar will switch to the original view and at the top you will see a summary of the terms you have just created:

Now you can confirm the created events with the Create lessons/events button. The system will add them to the group and the window will automatically close.
However, if you want to add more events, continue as you did at the beginning by clicking on Add lessons/events or by clicking on the template.
Creating terms from templates
If you create some groups of lessons/events frequently, you can save their settings as a template. When creating lessons/events, there is a Save as Template button in the left-hand bar. When you click on this button, the app will prompt you to give it a name:

This template will then be displayed in the template list. Clicking on its name will automatically create a new group of lessons/events with the same settings that were saved in the template.
Template management
You can rename and delete templates. The templates are stored in your profile, so your colleagues won’t see them and you can create up to 100 of them.

Making lessons/events for lectures and one-off courses
- The left bar always shows only the date and time
- It is not possible to create more than one lesson/event
- Event settings cannot be saved as a template, nor can a template be used to create an event.
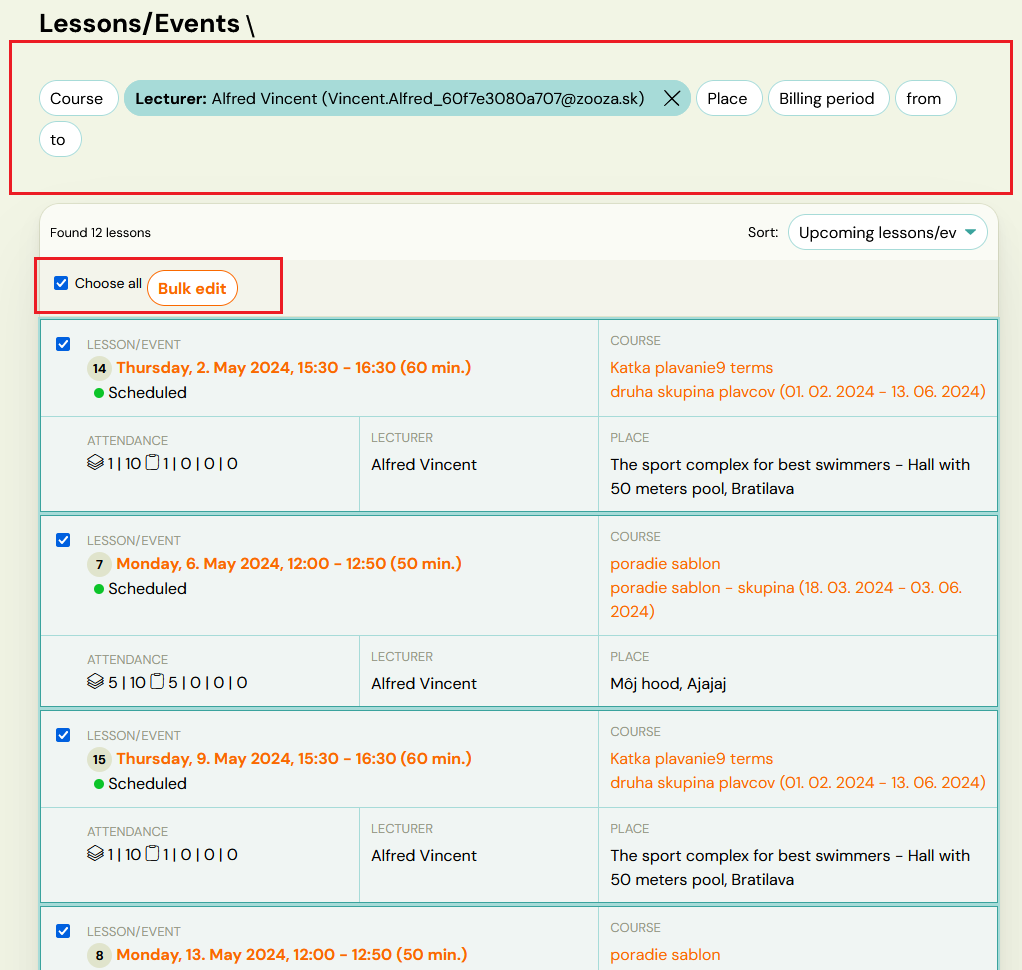
Overview of lessons/events

- Course
- Lecturer
- Place
- Billing period
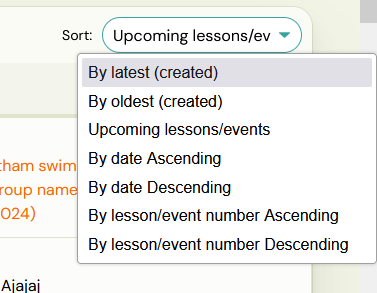
- Time period FROM – TO
- Day of the week
- Status (scheduled/ cancelled)
- Type (lesson over capacity, lesson under capacity, custom replacement lesson)

Bulk edits of lessons/events
Bulk edits are available in the Lessons/events category. First, find and mark the events you want to change. Then click on the Bulk Edit button.

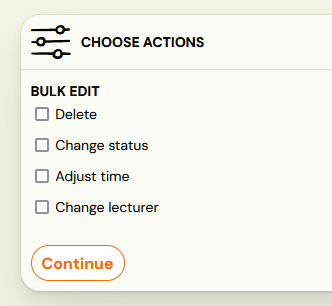
Next select an action and proceed through the individual editing
steps.

You can also combine edits with each other. For example, you can
change both the time of the events and the lecturer in one click.

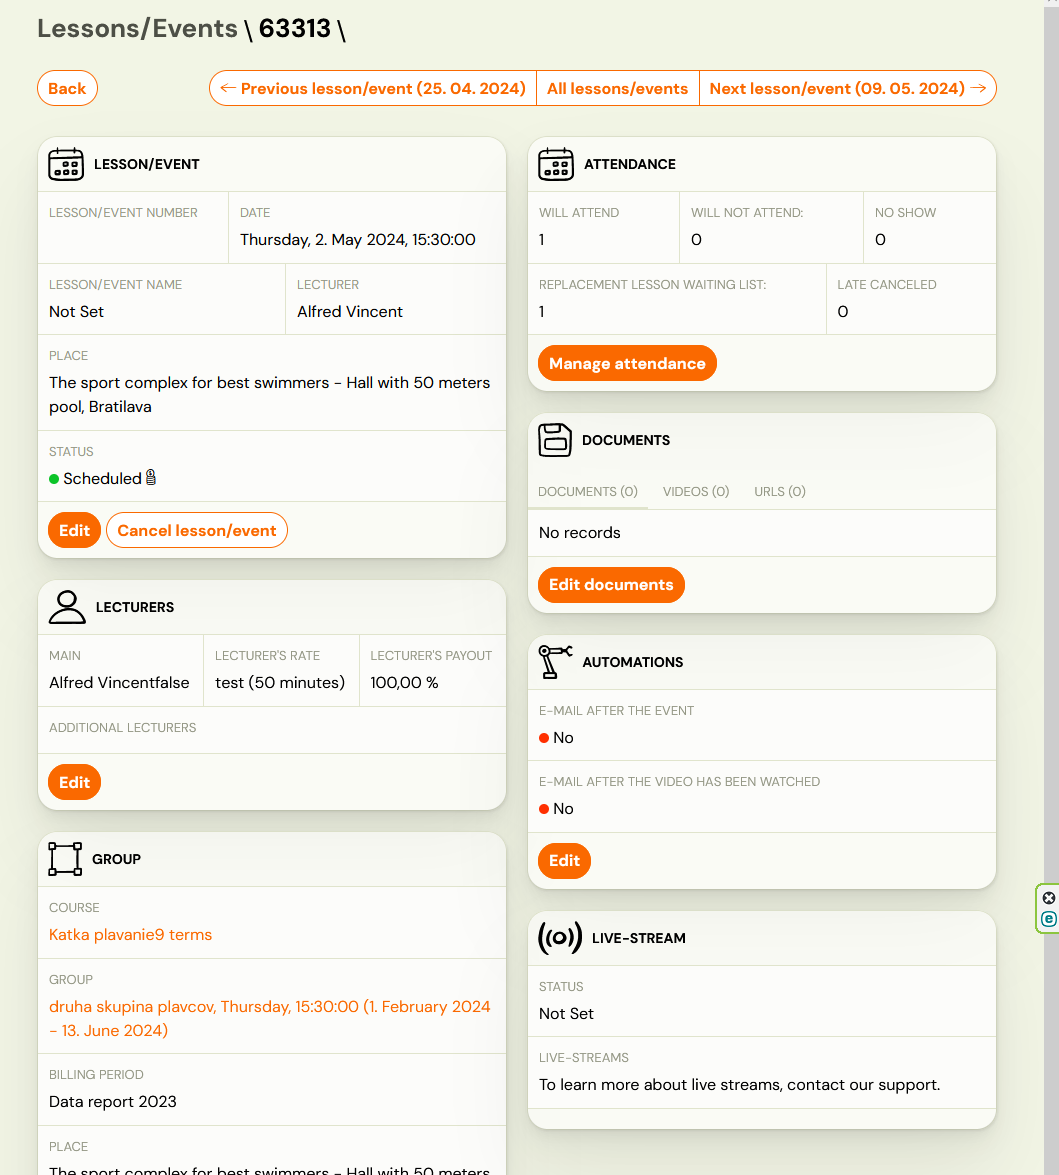
Change of one lesson/event
To change a single lesson/event or to change its settings, click directly on its name – date – in the list of lessons/events. You will see a menu of settings in categories.
