Payment templates creation

Within the payment templates, you have several options on how to use them for your courses and clients. Please refer to the instructions for more information.
Usage
Language courses
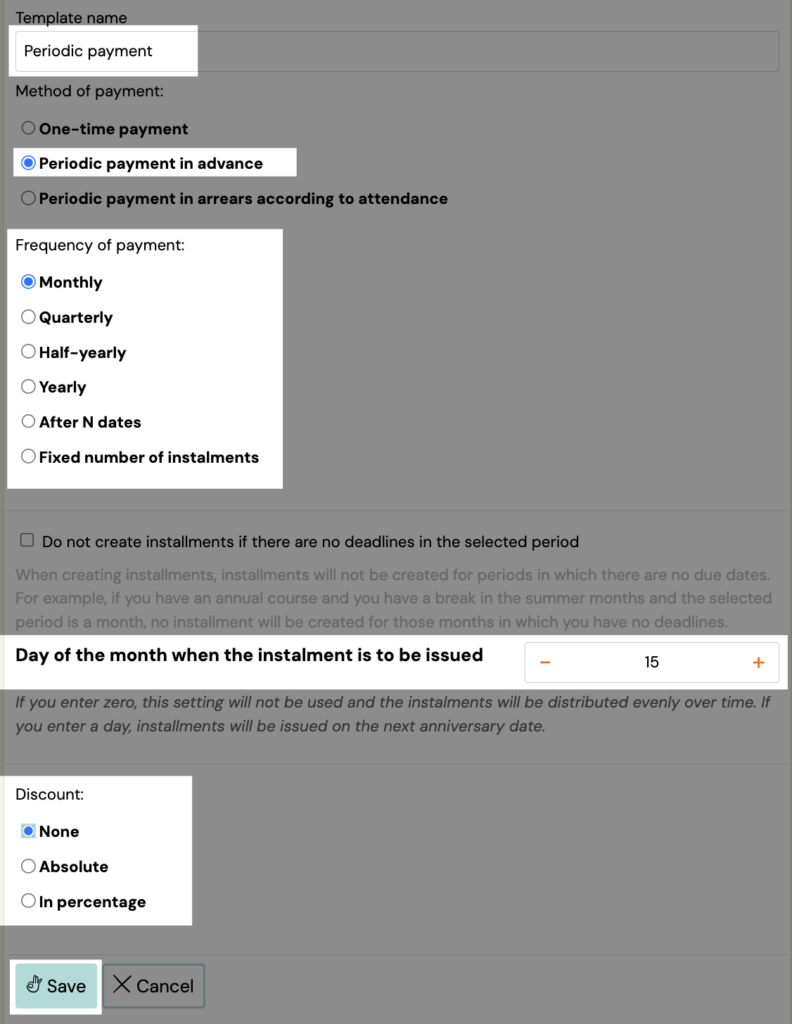
- Periodic payment in advance with no discount – monthly. It will be used for regular monthly payments for the course, which will go out to the client on the day of the month that you can choose.
- Periodic payment in advance with a smaller discount – semi-annually. It will be used to pay for the course in two installments. If the client chooses this payment, he will have a discount of, for example, 5% on the course, which will be automatically calculated from the price of the course.
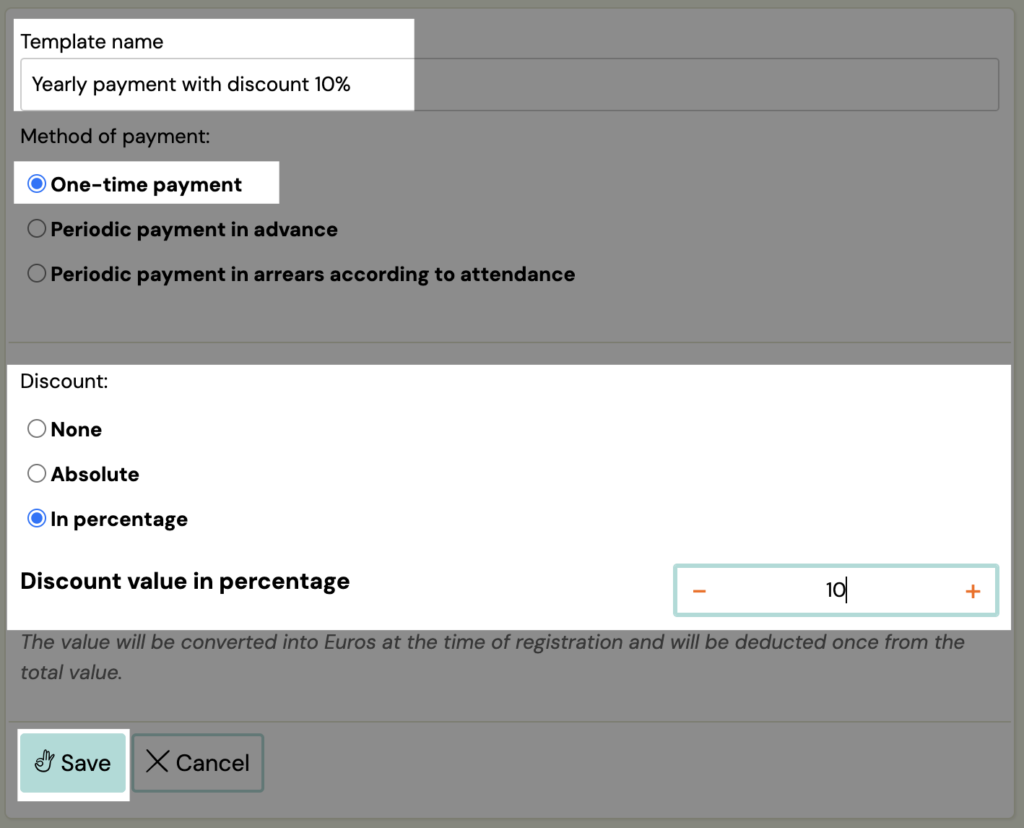
- One-time payment in advance with a larger discount. It will be used to pay for the course for its entire duration, i.e. the whole year. If the client chooses this payment, he will have a discount of, for example, 10% on the course, which will be automatically calculated from the price of the course.
Children courses
- One-time payment with discount. It will be used to pay for the entire duration of the course if the parent registers only one child. I will set a smaller incentive discount, for example 3%.
- One-time payment Siblings with a discount of, for example, 20%. It will be used to pay for the entire duration of the course, in case a parent registers more than one child. The discount is automatically calculated from the price for 2x course price You need to set up the option to add a person at the course level – online registration.
- Periodic payment for a fixed number of installments without discount. It will be used for payment divided into 3 equal parts, in case the parent registers only one child. Here I have no reason to give a discount.
- Periodic payment for a fixed number of installments, Siblings with a discount of, for example, 10%. It will be used for payment divided into 3 equal parts, in case a parent registers more than one of his/her children. The discount is automatically calculated from the price for 2x course price and divided into 3 parts. You need to set up the option to add a person at the course level – online registration.
Set up payment templates
In order to set up payments on a course, you need to create payment templates first. To set them up, proceed as follows:
- Click on the Settings tab in the left menu and then click on the Payments
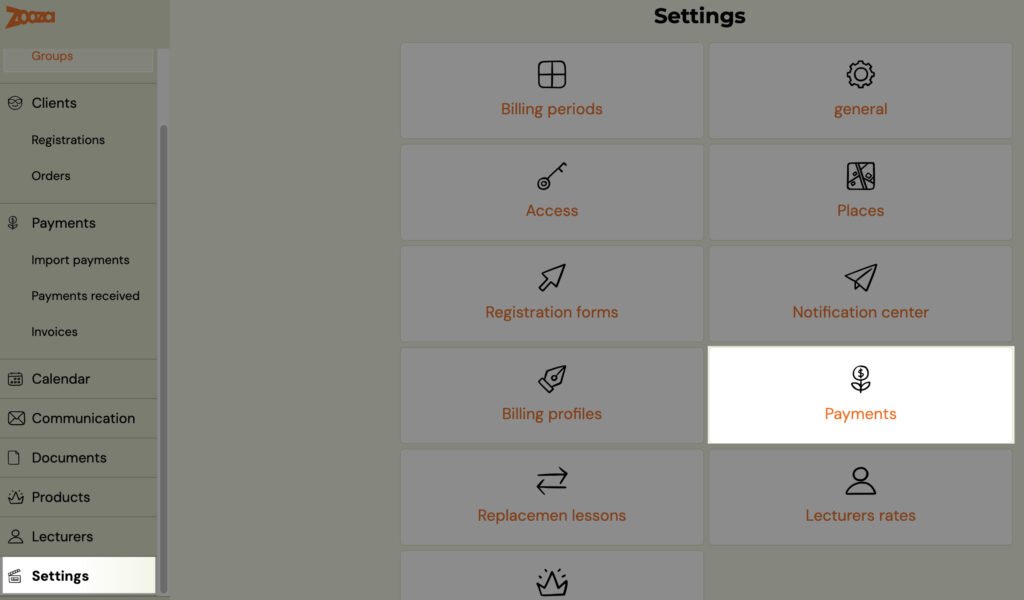
- To add a new payment template, click the Add button at the top of the screen and fill in the required parameters for the template

Select one of the options as required:
- One-time payment – you have the option to set up a one-time payment for the course.For example, if a client chooses a course that lasts half a year, but does not want to pay monthly, they choose to pay for the entire course at once.For such a payment you can give a discount either none, in EUR or as a percentage.
- Periodic pre-paid payment – you have the option to set whether the course can be paid gradually, i.e. in frequency.Here you select from the options – Monthly, Quarterly, Semi-annually, Annually, After N terms (the number of terms after which the next installment for the course will be issued), Fixed number of installments (the number of installments into which the price for the course will be divided).The course provider has the option to grant a discount for this type of payment either none, in EUR or as a percentage.
- Periodic payment paid in arrears according to attendance
This option allows you to charge clients based on their actual attendance. The system creates and sends instalments only after the client has attended the required number of sessions, depending on the frequency you set.
There are two possible modes:
1) Periodic frequency (e.g., monthly)
When using a time-based frequency:
- When attendance is recorded, the system creates an instalment scheduled for the next anniversary date of the frequency (e.g., next month).
- Each time attendance is marked as “attended”, the amount on that instalment increases.
- When the instalment’s scheduled date arrives, it is processed during the nightly job and the client receives the payment request. At this moment, the registration receives the corresponding outstanding balance.
- If the client does not attend any session within the chosen frequency period (e.g., no attendance in a whole month), no instalment is generated.
2) After N sessions (e.g., payment after every 2 sessions)
A When using a frequency based on a number of attended sessions:
- When attendance is recorded, the system creates an instalment scheduled one year ahead.
(This is only a placeholder date — it will be adjusted once the required number of attendances is reached.)
- Each time an attendance is marked as “attended”, the amount on that instalment increases.
- When the required number of attended sessions (N) is reached, the instalment is rescheduled to “today” and will be processed during the nightly job. At this moment, the registration receives the outstanding balance.
- If the required number of attendances is reached multiple times on the same day
(example: frequency = every 2 sessions, and 4 sessions are recorded in one day),
then multiple instalments will be created on that same day.
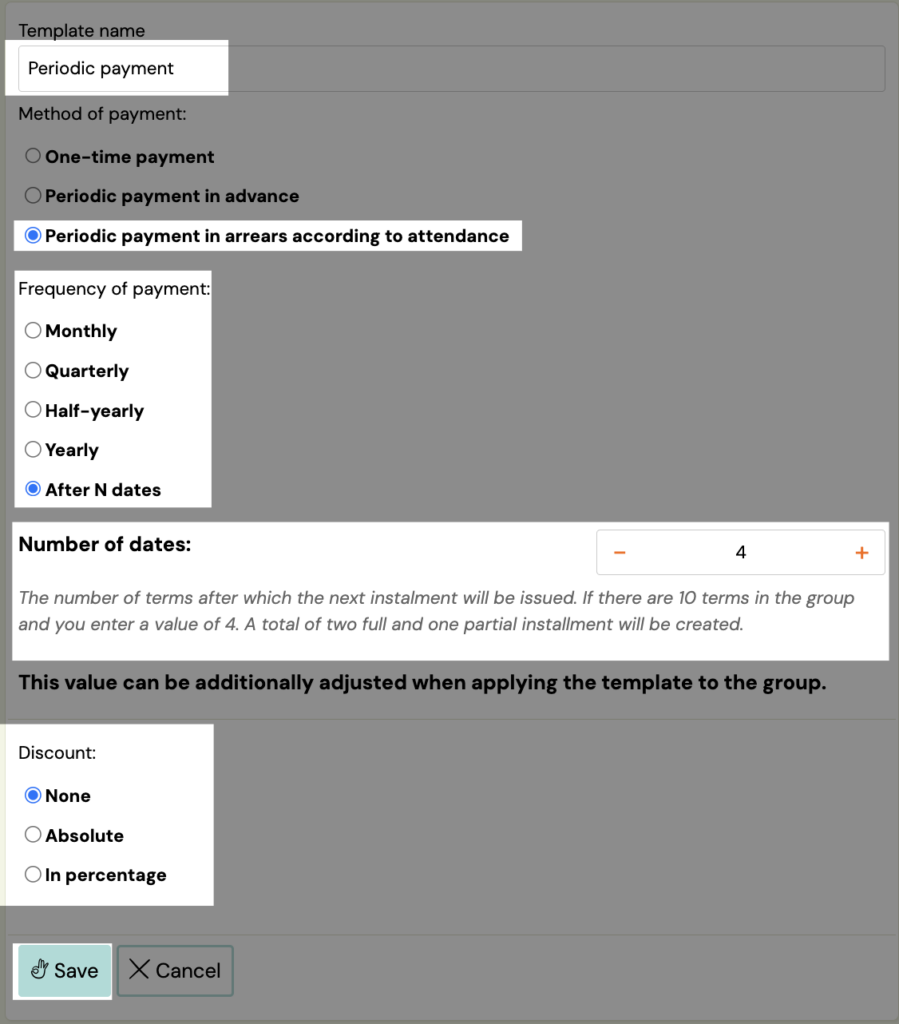
Save the template by clicking the Save button.

Other template settings, template activation in courses
To change and modify the template or activate it on the course, please follow these steps:
- V zozname platobných šablón kliknite na ikonu pera vedľa šablóny, ktorú chcete upravovať
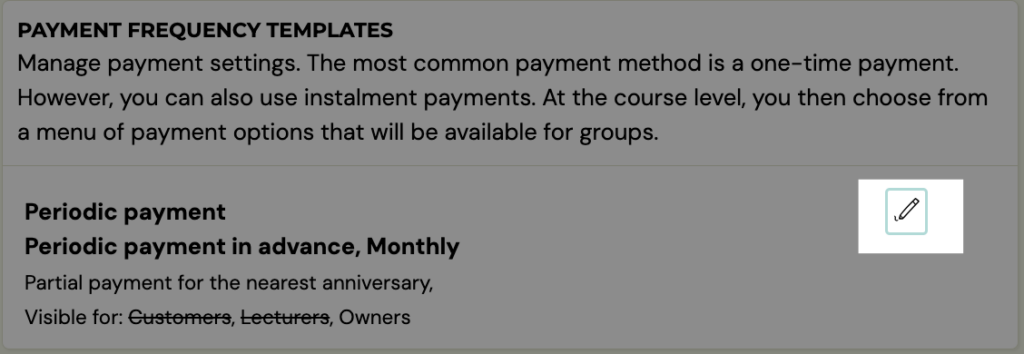
- In template editing you have the option to set the visibility of the template, i.e. what group of people will be able to use this template – Customers, Lecturers or both.1. Customers – you choose the option to have the template visible to customers directly when they register on your site.2. Lecturers – visibility for lecturers means that the lecturer will also be able to assign registrations to a given template

- Below in the courses section you have a list of your courses and for each of them you can activate or deactivate the template
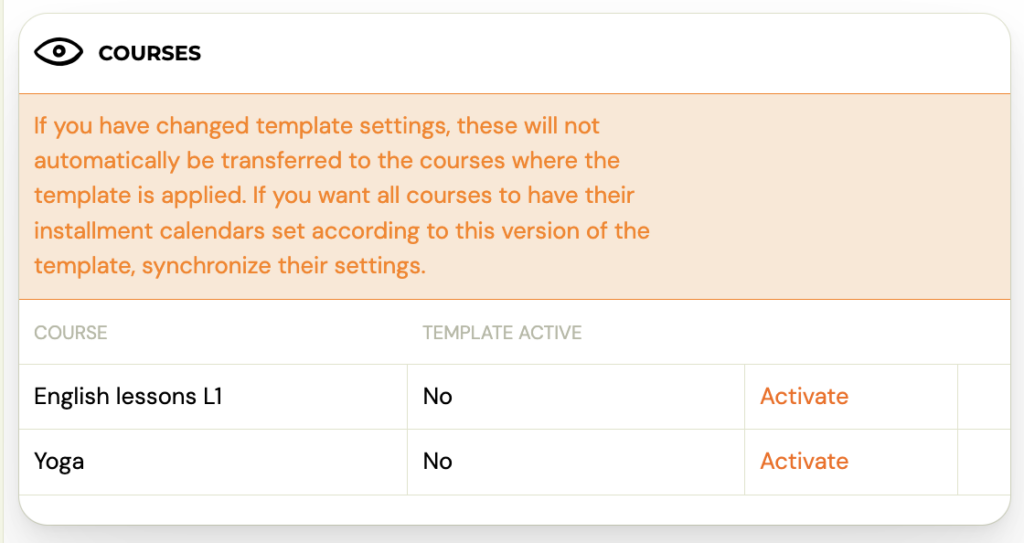
- When you make changes to the template, we recommend that you Sync Settings. This will ensure that any changes made to the template will also be reflected in courses and groups where it has already been activated.


- Then Save the changes. Alternatively, you also have the option of using the Delete template
These payment templates created can then be used and inserted into your new or existing courses/groups.
Insert payment templates into a course/group
The created payment templates need to be inserted into newly created or already existing courses. The templates created in this way can be combined in the courses according to your wishes and needs. This means that you can use multiple payment templates for one course.
Insert templates into courses
- In the list of courses, click on the name of the course in which you want to add a template or check the activation of the selected templates
- In the Price and Payment section, click the Edit button

- Below in the Payment Frequency section you can see which payment templates you have Active and which Inactive. Active payment templates are the ones highlighted in colour (yellow background under the text, blue knob)

- If you wish to activate the template, click on the white Active button
- If you wish to deactivate the template, click on the white Inactive button
Within creating a new group
This selection of templates will appear in the menu when you create a
group for the course, where you again have the option to decide whether
or not to enable this payment option. To activate the template on the
group, click on the white Active button.

Then save your selection by clicking Create.
When inserting into an existing group. Edit payment templates in existing groups
Select a group. In the Payment Frequency section, click the Add Template button. You will only see the ones that are activated on the course.

When you click on the pen icon, you will be presented with the option to activate/deactivate the template. Then click on the pipe icon and the Save button at the end of the screen to confirm the changes you have made.

To delete a template from the group, click on the trash icon.
You can use the arrow keys to change the order of the templates and set them as you want them to appear in the registration form.

This selection of payment options will then be displayed in the registration form on your website as follows:
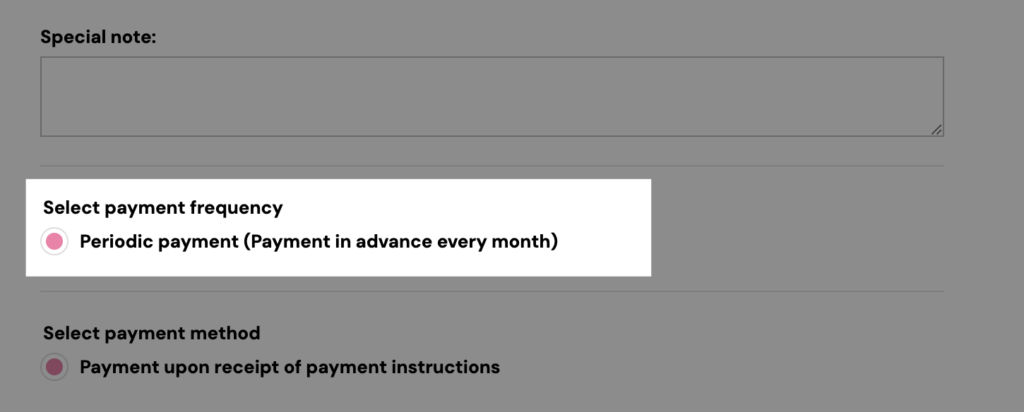
The client has to choose one of the offered options and the final price for the course is recalculated according to the client’s choice, if it is affected by this choice (if a discount has been set in the template).

Note: If a client registers for a course that has already started and you have set up manual approval for late registrations in the course settings, the payment type will not appear on their
registration. Such registrations are marked as late by the application
and require manual editing.
- Adjust the amount owed as needed or add a compliant payment template to your registration
- Manually change the registration status to Registered
Payment templates on registration
- Select the registration you want to edit.
- Under Payments, click View Payments
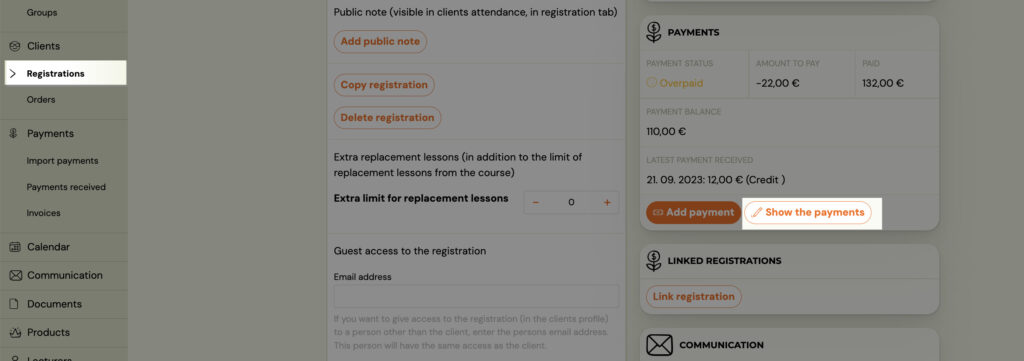
- In the Installment Plan section, click Create (if no installment plan has been set up on the registration) or Change (if an installment plan has already been set up on the registration).

- This will open the settings for creating a payment plan. Select the options that suit you and click continue. If you enter a value in the Registration Fee field, it will be applied as part of the first instalment – so the first instalment will be increased by the value of the registration fee.

- Click the Select button next to the template you want to apply. Zooza will show you what the repayment amount is, how many repayments will be incurred, what the discount is and what the final amount paid by the customer is after all repayments have been made. Then click Continue
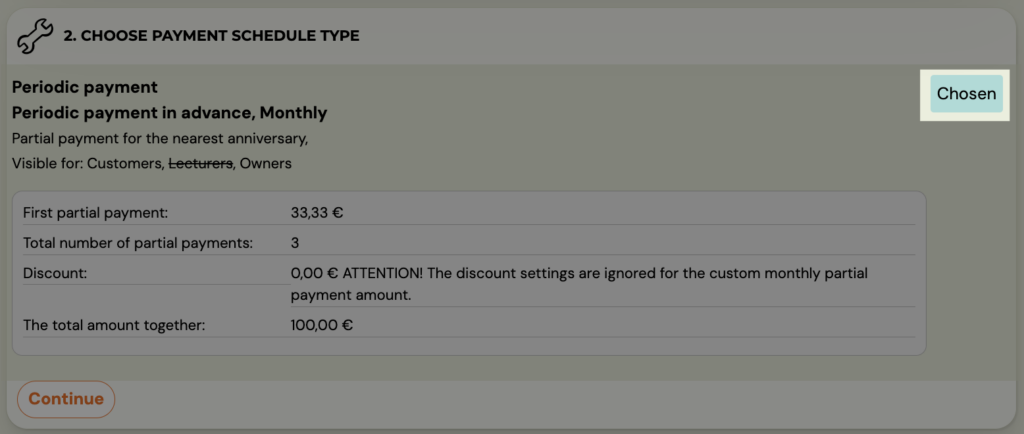
- In the next step, check your settings and click Continue
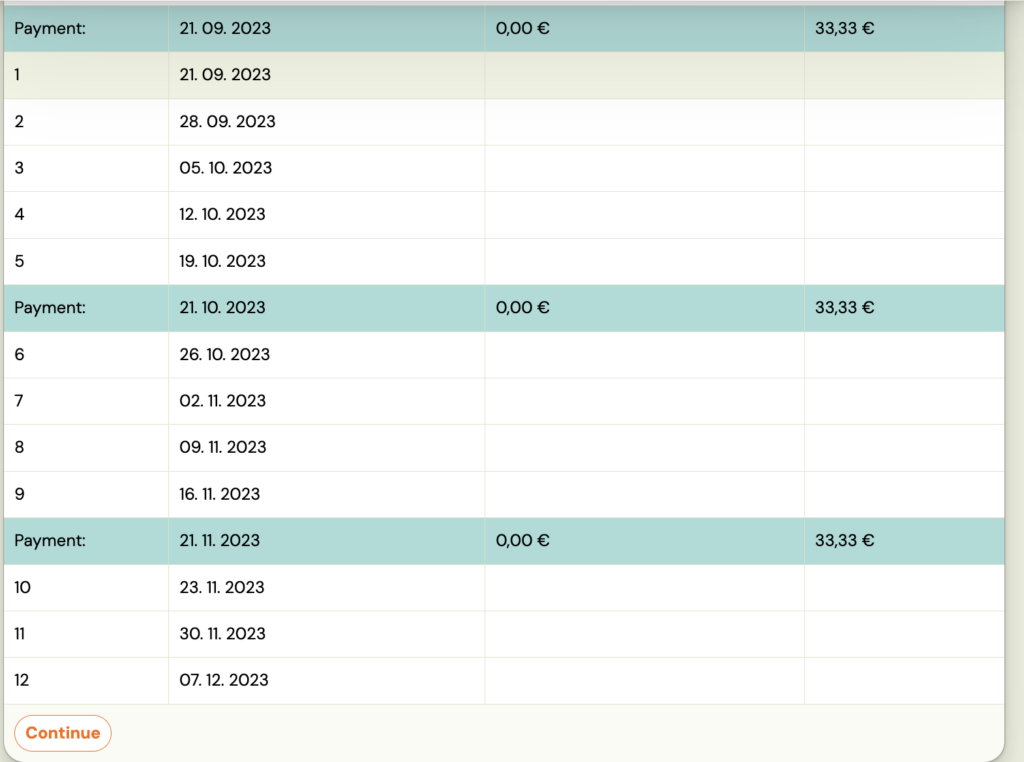
- To apply the payment plan to a given registration, confirm your selection by clicking on the Finish button.


How to delete payment template on registration?
You can delete the set instalment plan on the regisdtration by clicking on the Partial payments overview button.
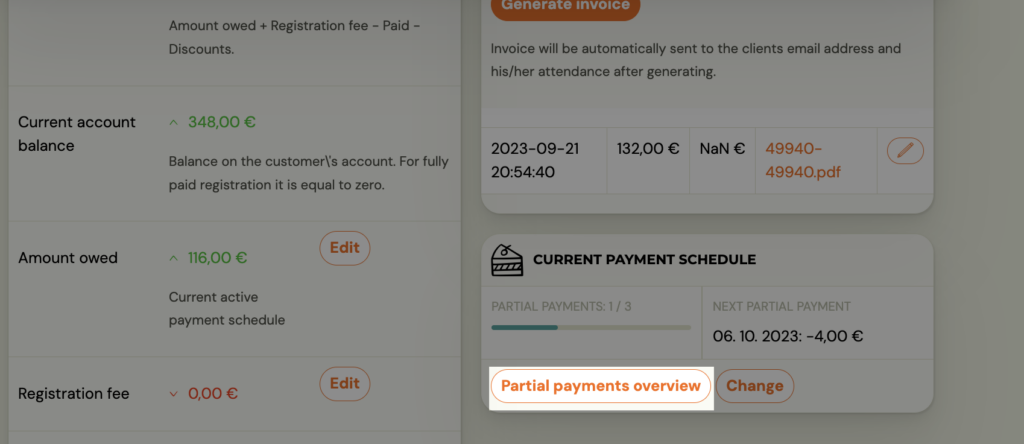
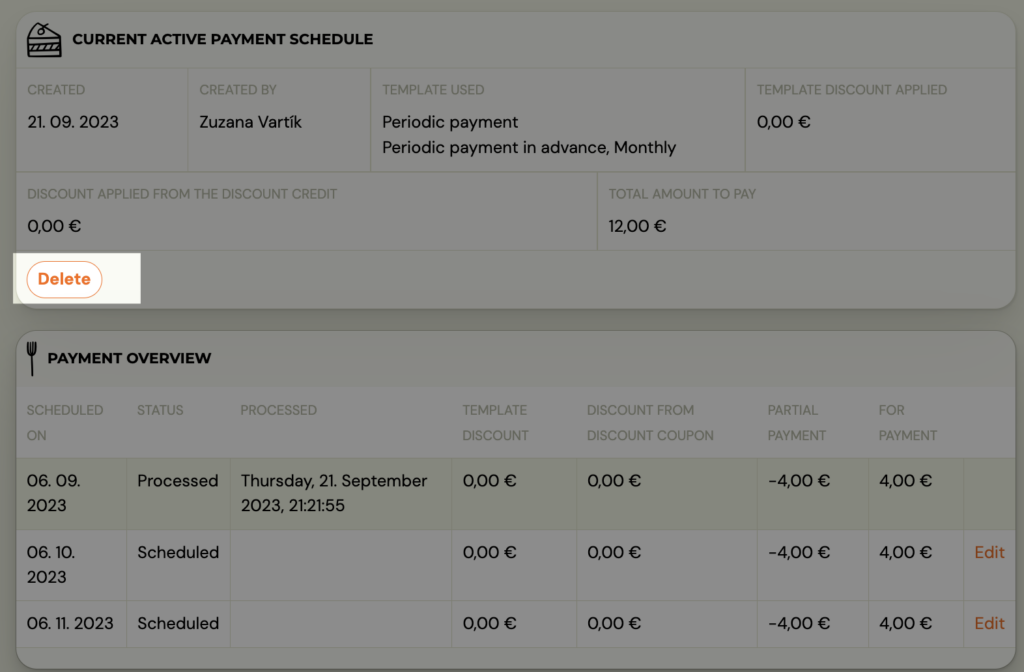
Then click the Delete button. The registration reverts to a no-payment status.
Prehľad splátok

- Client - to search for a specific client,
- Status - you select whether the installments are scheduled or processed,
- Scheduled Date - search for installments by date.
Related Articles
Payment Pairing for Bank Transfers & Direct Debit
Every booking in Zooza automatically creates an expected amount to pay based on your course or group settings. Payments can then be paired with that booking in one of four ways: Manually (cash or bank transfer) Automatically via bank integrations ...Payment options
Cash payment The most common and worst option is to pay in cash. Why the worst? You have to work with banknotes and everything has to be done manually. When a customer hands you money you have the following options: Manually enter the payment on the ...Payment tile on registration
You can correct or modify each payment. Modifications can be made to registrations separately. In this case, you are adjusting the amount owed. What is the amount due can be found in more detail HERE. The amount owed on the registration itself can be ...Edit payment on registration
You can correct, edit or move each payment. Adjustments can be made individually at the level of registrations, in which case it is a change to the outstanding amount. What constitutes an outstanding amount is explained in detail HERE. The amount ...Automatic payment reminders
Automated client communications include automatic payment reminders that are sent to outstanding registrations and can help you improve your clients’ payment discipline. Automatic reminders are only sent if you set them to be sent. If you set them to ...