Online registration
To control how the course is displayed on your website and how communication with clients is managed, use this setting. It includes three parts:
- Online registration
- Customizing the registration form
- Communication
Online registration
Registration options
In the Registration options section you set the visibility on your website and in the registration form.you can control what is visible on your website and in the registration form. If your course includes a Trial or Blocks, you can decide exactly what you want clients to see.
 Example: If you don’t want clients to choose between blocks and the full course, select the Blocks only option.
Multiple registrations for the course
When you enable multiple registrations for a course, you can choose whose information you need to collect — only from the main registrant or from every participant.

We also recommend selecting the Payments are managed by registrant option in the Price and Payment tile. This ensures that all payments for the registrations are grouped under the main registration, using a single variable symbol, and allows clients to pay everything in one transaction.
Other
These settings let you control how long classes remain visible in your registration form in the following situations:
- When a class reaches capacity – choose whether it should still appear or be hidden.
- Before the course starts – set the number of hours in advance when the course should be hidden from your website’s course catalogue.
 Alert: Hiding the course before it starts will disable the option to allow late registration in the Price and Payment tile.
Class settings
Here, you can choose which classes from your list should appear in the menu on your website as available for online registration. This is especially useful when launching a new set of classes and you want to open online registration for multiple classes at once.
Customizing registration form
If you need different field names for this course’s registration form, you can set them in the Customizing the Registration Form section. This is useful when certain courses require specific field labels that differ from your standard registration form.
Communication
Communication plays an important role throughout the course. Each registration type has its own specific communication settings, in addition to a standard set of email templates you can use.
Email templates and signature
Select which templates to use for:
- Confirmation email
- Lead collection confirmation
- Session reminders
- Preset signature
Automatic email reminders
Choose whether the system should send a reminder to participants the day before each session.
 Note: The exact time the reminder email is sent can be configured in the message template Automatic session reminder.
Notification about upcoming sessions
For open courses only Zooza provides an additional email notification for upcoming sessions with available slots possible for booking.
 Note: This template is to be found in Message templates as Upcoming Session Notification template.
Notification to waiting lists about available slot
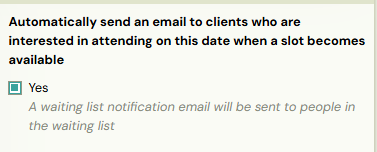
If your one-session course is full and you allow clients to join a waiting list, you can set up an automatic notification to inform them when a spot becomes available due to a cancellation.

 Note: This template is available in message templates as Automatic waiting list notification.
Related Articles
Auto-enrollment
Auto-enrollment is used for efficient course enrollment for existing clients with a pre-filled registration form. This allows the client to receive priority enrollment in a new period (for group courses) or to select a new date for individual ...Class creation
Classes are used to divide the course into time periods and can possibly be further subdivided, for example by level or by location. Classes ensure that the next time you repeat a course, you don’t have to create a new course with all its settings ...Blocks creation
The blocks feature allows you to divide the terms within a group into smaller logical units - subgroups that you can use for different purposes depending on the needs of your organization or the type of course. For example, blocks can be used for: ...Course settings
After creating your course, Zooza will automatically take you to the Course Overview page. Here, you can add classes, adjust settings, and review your course’s details. Course overview New course If you’ve just created a blank course, the overview ...Price and Payment
When creating a course, the wizard asks you to select the course type — Registration for one session, Open Course, or Registration for the full duration. If you have not yet decided on the course pricing, you can update it later in the course detail ...