Course settings tile
Course settings are pre-filled when you create the course, but you can adjust them at any time. The settings are organised into several sections:
- Basic information
- Additional settings
- Labels and colours
- Gallery
Basic information
In this section, you can define the core details of your course:
- Course name - the name displayed to clients and used throughout the system.
- Product Code (SKU) -if you are part of a network, this is the product code assigned by the master franchisor.
- URL address where the course description is more detailed
- Course description
Additional settings
- In the Course Type section, you can adjust the format of the course — for example, changing it to an online session, a photography course, or a standard course with scheduled sessions.
- You can also update the Target audience if the course changes from group classes to individual sessions, or vice versa.
- Selecting the For children checkbox changes the wording in certain parts of the application. For example, in the registration form, “Name” will become “Parent’s Name.”
- If you check the Archive box and save the settings, the course will be removed from your active course list and placed in the archive. A full explanation of this feature is available HERE.
Labels and colours
- In the Tag field, you can optionally enter a category name for the course. Tags are for your internal use only and help you organise and filter your courses more easily. To save the tag, click OK next to the field. For more details on using tags, see the Tags manual.
- You can also assign a course colour (if it wasn’t set during the course creation wizard) to help clients easily identify your courses. For example, a course for 3–4-year-olds could be set to “Zooza Orange,” making it instantly recognisable on the calendar, such as on Tuesdays and Thursdays.
Gallery
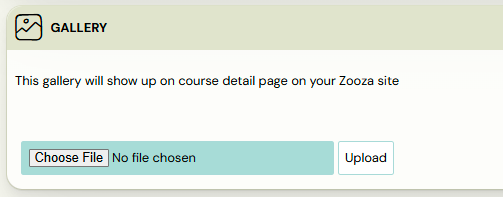
At the bottom of Course settings tile you have a ready-made gallery that will appear in the course details on your Zooza website. For information on how Zooza Sites work and how to set them up click here.

Related Articles
Course settings
After creating your course, Zooza will automatically take you to the Course Overview page. Here, you can add classes, adjust settings, and review your course’s details. Course overview New course If you’ve just created a blank course, the overview ...Class creation
Classes are used to divide the course into time periods and can possibly be further subdivided, for example by level or by location. Classes ensure that the next time you repeat a course, you don’t have to create a new course with all its settings ...Course creation
Before your clients can sign up, you’ll need to create a menu of courses in the application. If you’re not sure what types of courses you can create, check the Course Types documentation. In order to create a new course, follow these steps: Open the ...Course, group, lesson definition
In real life, your clients sign up for a course and then, when it starts, attend the course within the agreed schedule. The moment you have more customers in one course than you can handle, you naturally start to divide them into groups. In the app, ...New course with existing clients
When you finish old courses/groups, you have many clients who want to continue with you. That’s why you start thinking about how to create new courses and how to transfer your client database. The app allows multiple ways you can do this for them or ...